
In this guide, you will learn how to install the Zoiper softphone on your Windows, Mac, iPhone or Android phone.
- Downloading Zoiper for laptop
- Logging in to Zoiper
- Testing Zoiper
- Deactivating Zoiper
- Zoiper for smartphones
Downloading Zoiper for laptop
- Download Zoiper for Windows and Mac here.
- You can start with the free version to try out Zoiper. Please note that features like sound, making outgoing calls, and other useful functions are not included in this free version. Incoming telephony seems to be the only thing that works with the free version.
- Some of these features are included in our Webphone, which remains free for our customers. Are there features missing that you would like to see in our Webphone? Let us know here. The more customers who want it, the higher it will be on our list to build.

- The above images were taken from a Macbook and created using the free version.
- In this case, click on Continue as a Free user.
- Allow access to the microphone.
Logging in to Zoiper
- Click on Create Account.
- Choose Voys.
- Leave this for a moment and open Freedom.
- Go to Admin.
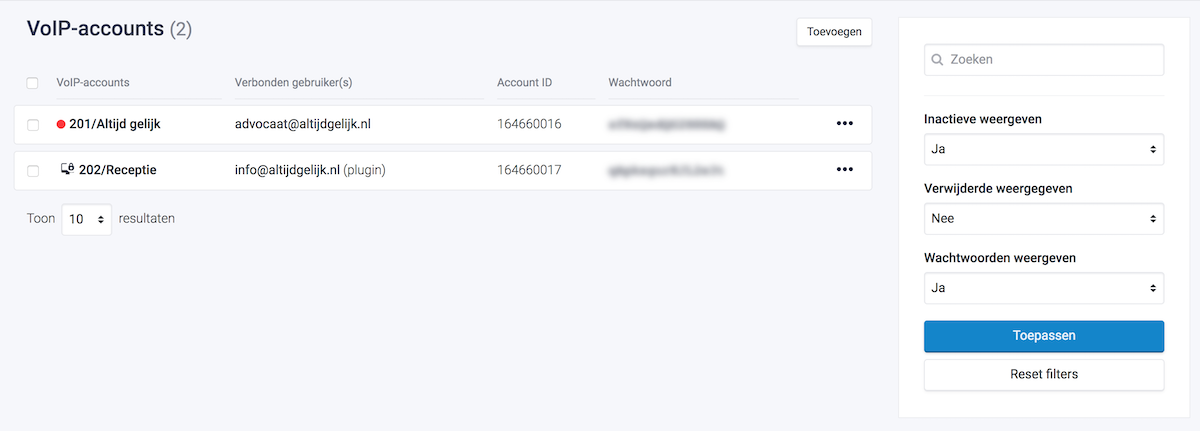
- Find the VoIP Account that you want to link to Zoiper to be able to make calls via Freedom with Zoiper.
- Behind the chosen VoIP Account you'll find:
- Account ID: Enter this in the Username field in Zoiper5.
- Password: Enter this in the Password field in Zoiper5.
- Click on Sign Up.


Testing Zoiper
- Click on Configure.
- Make sure the headset you want to use for calling is connected to your laptop.
- Click on Start test.
- Go through the steps. You can skip the camera test if you don't want to use that feature.
The Zoiper softphone is now ready for use. Here you can read about all the features of this softphone.
Deactivating Zoiper
- Open the Zoiper softphone.
- Click on Accounts.
- Click on the account.
- Click on unregister in the top right of the screen.
- Your account is now disconnected.
- To use your VoIP account again immediately, it's helpful to change the password for that account.
- Open Freedom.
- Go to Admin.
- Click on VoIP Account.
- Click on the VoIP Account that was previously connected to Zoiper.
- Change the password.
- Click on Save.
Zoiper for smartphones
Zoiper is available for iOS and Android. Follow the steps below to install and configure Zoiper. The guide below is based on an Android device; for iPhone, Windows, or Mac, the interface may look different.
- Download the Zoiper app from Google Play for Android or the App Store for Apple.
- Open the Zoiper app.
Enter the following information:
- For 'User name'@ 'PBX/VoIP provider', enter the Account ID of your VoIP account followed by 'ha.voys.nl'. You can find this information as follows:
- Go to Freedom.
- Click on Admin.
- Click on VoIP Account.
- Behind each account, you'll see the Account ID and password.
- For Password, enter the password of your VoIP account.
Note! Do not use a VoIP account that already has a phone device, webphone, or app connected to it. Use an account that is not in use or add a new one.
- Click on Create an account.
- Then click on Next.
- Click on Skip at Account setup.
- Select SIP UDP
- Click on Finish.
You will be asked if you want to ignore battery optimizations.
- Click on YES.
- This will keep your account connected to our platform and prevent it from disconnecting. If you choose not to do this, the account will disconnect and we won't be able to route incoming calls to this app.
You can now make calls with the softphone.